A bathroom reno for less than $15k…
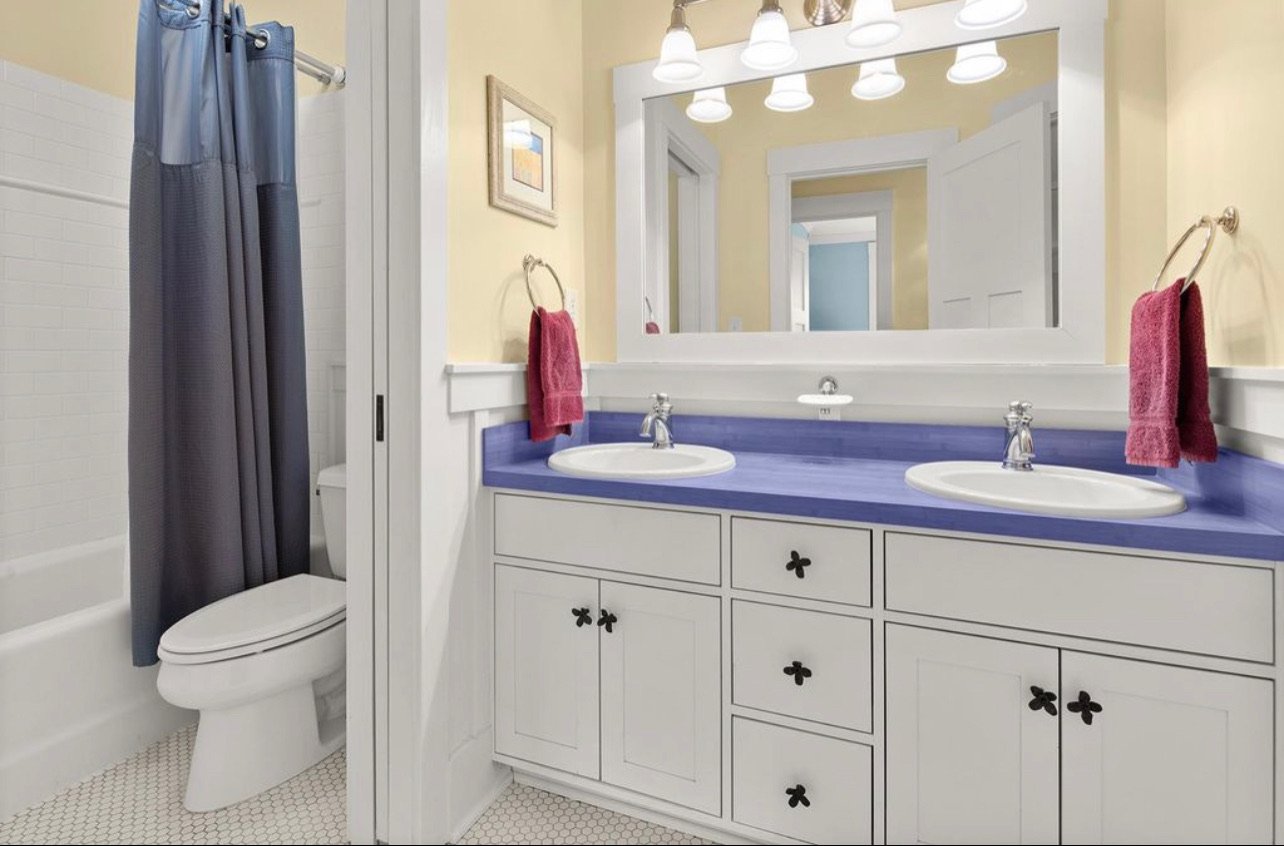
We moved into this home back in June 2021. Coming from new construction in South Minneapolis, I was ecstatic to have a “project home” and couldn’t wait to embark on the updates. The kid’s bathroom, located in our lower level, was a space we knew we wanted to tackle right away. Yes, functionally it worked, but the vanity was too short, the space felt cramped, and the purple countertop had to go.
Because it’s a kid’s bathroom, and because this isn’t our forever home, I knew I didn’t want to invest much money into this space. However, my husband and I aren’t DIYers so setting a budget of $15,000 was going to be tight; especially since I had all these great design ideas (as one does) that I wanted to incorporate.
As it happens, we ended up having to pivot numerous times. I’ve found that in most projects, it’s (a) difficult to balance function, form, and budget; and (b) pivots should be expected. You’ll see that the original design board I created (below) is reflective of the overall aesthetic; however many of the detailed design elements did not make it to the final stage. The McGee & Co round mirrors? Nope. The beautiful watercolor print from Anthro? I wish. And the black tiled border did not make it either. Why? Because our budget didn’t allow.

So, how did we stay within budget but still create a space that achieved my design wishes? Read on to find out.
After receiving a quote for demolition, my husband decided to tackle this himself. As I mentioned previously, we are not DIYers so this made me very nervous as part of the demo involved removing the pocket door wall. It also involved being extremely careful around the board and batten which we had decided to keep to save on costs. But, he did a great job and saved us around $1,000.
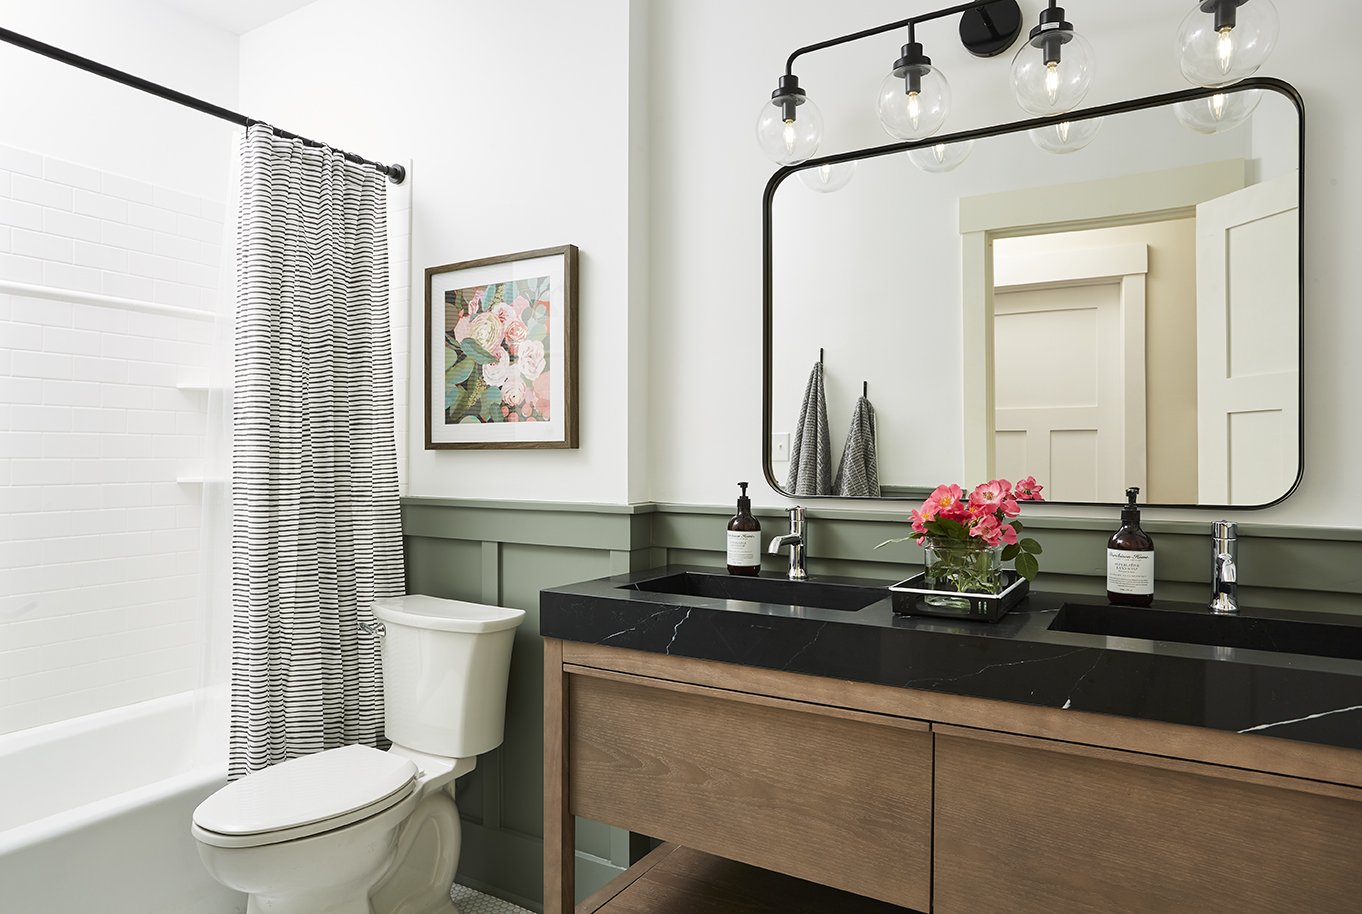
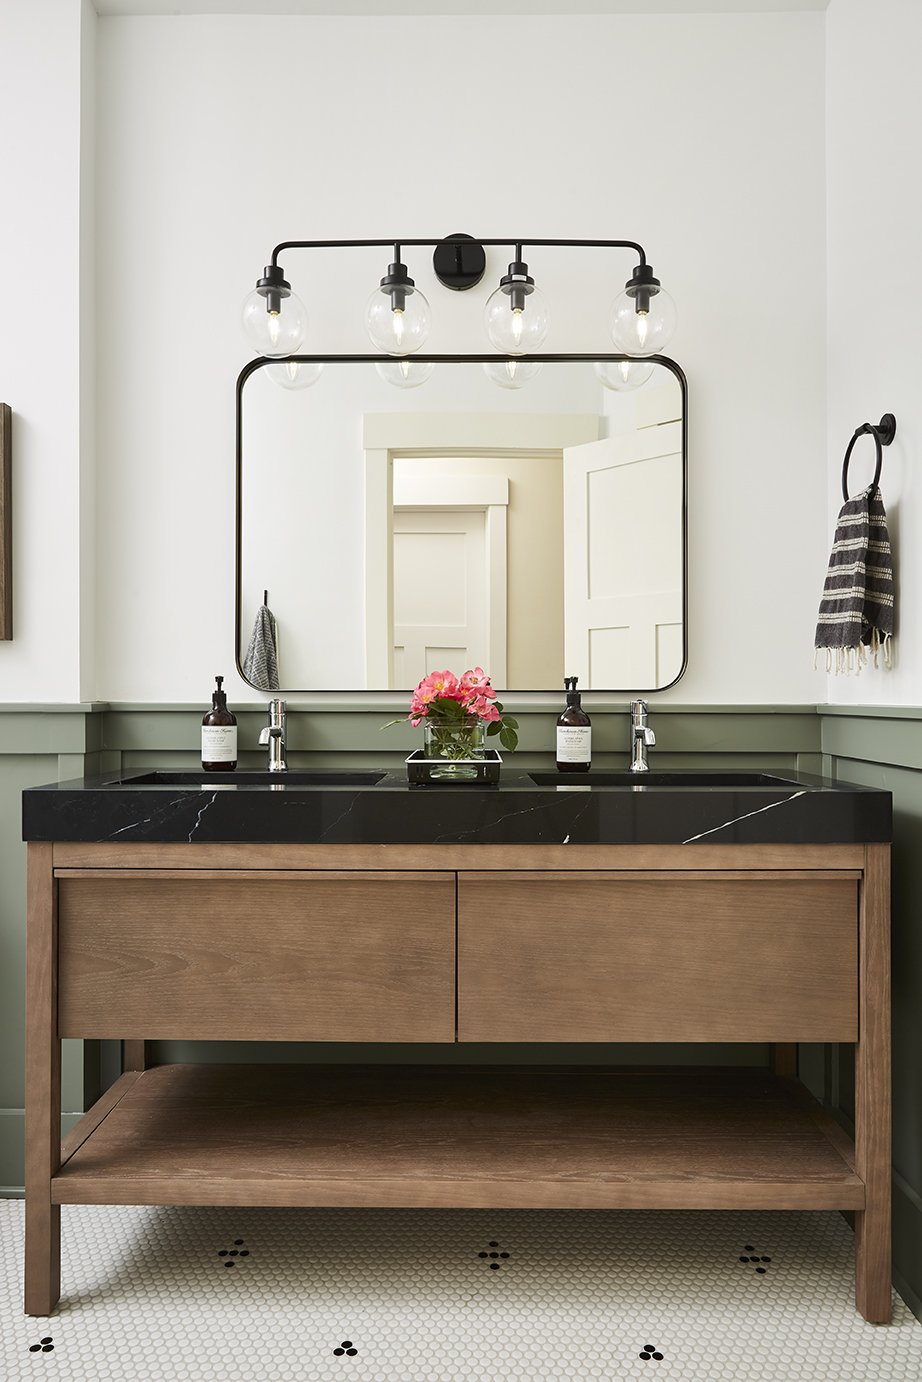
We ended up keeping the white subway tile in the shower and scrapped my idea of incorporating a black subway tile border that brought the tile all the way to the ceiling. Sidebar - this is one of my design pet peeves: when shower tile doesn’t continue up to the ceiling. So, I’m hoping that we can tackle this another time.
The penny tile that I wanted (for the floor) was a true statement piece, incorporating this intricate pattern in black, white, and gray. But, it also cost more than $35/sq. ft. So, we forged ahead with white penny tile and I worked with our tiler to add in some black here and there for some added interest.
We kept the existing tub, as well as almost all the shower plumbing fixtures.
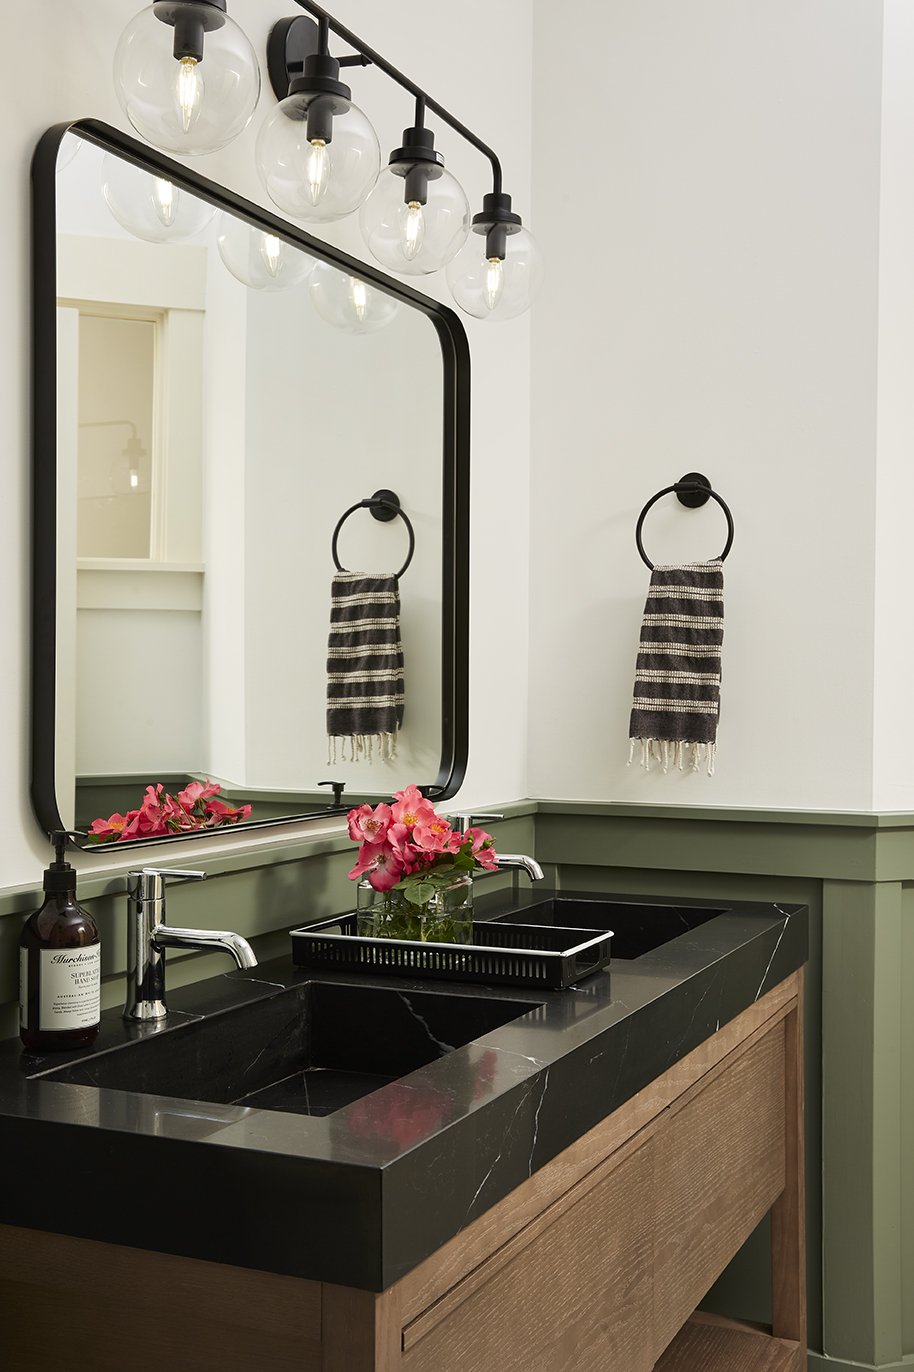
We opted for a pre-fab vanity from West Elm instead of investing in a custom or semi-custom option.
The lighting fixtures were intentionally purchased from Pottery Barn as we had gift cards there.
All decoratives accessories (art, towels, towel holders, etc.) were purchased from Amazon and Target.
We kept the footprint of the bathroom as is, meaning we didn’t move electrical or plumbing.
Now, will this bathroom land in the pages of Domino or House Beautiful? No. And is this a realistic cost of most bathroom renovations? No. But I hope it serves as a reminder that working with “what you got” can still produce a beautiful transformation. Bonus points - focusing on redesign and reuse of existing materials is environmentally friendly as well!
Lastly, if you have a decorating or design project you’re going to embark on, please reach out no matter your budget size! We we would love to chat and be able to help. #shamelessplug
Shop our bathroom below!